HTML tutorial for the complete beginner
Here, we’ll be covering the basics of HTML straight from scratch, for those who are just beginning to learn about it.
Special shoutout to 2019 Curry TIP for prompting me to make this guide, hopefully ya’ll find this useful and informative.
Getting Set Up
Here’s what you’ll need to get started on using HTML:
- a text editor - I recommend using Brackets, but you can use any, even notepad would work.
- a web browser - of course you have this, how else would you be viewing this guide? For this guide I’ll be using Google Chrome, but if you use some other browser like Firefox or Safari if you wanted to
but why would you use those, Google Chrome is soooo much better. I highly recommend using Google Chrome, as it is really helpful and makes Brackets so much better (you’ll see later).
NOTE: This is under the assumption that you will be only working locally, you will need to download/use any software to manage files remotely (meaning on another computer that’s not on your own).
It’s best if you had a folder that you did all your work on, so you can create a folder on your desktop and name it something like the bestest most amazing work I have ever done in my life DO NOT TOUCH. Or you can just call it html tutorial if you don’t want to embarrass yourself when someone sees your desktop.
Using Brackets
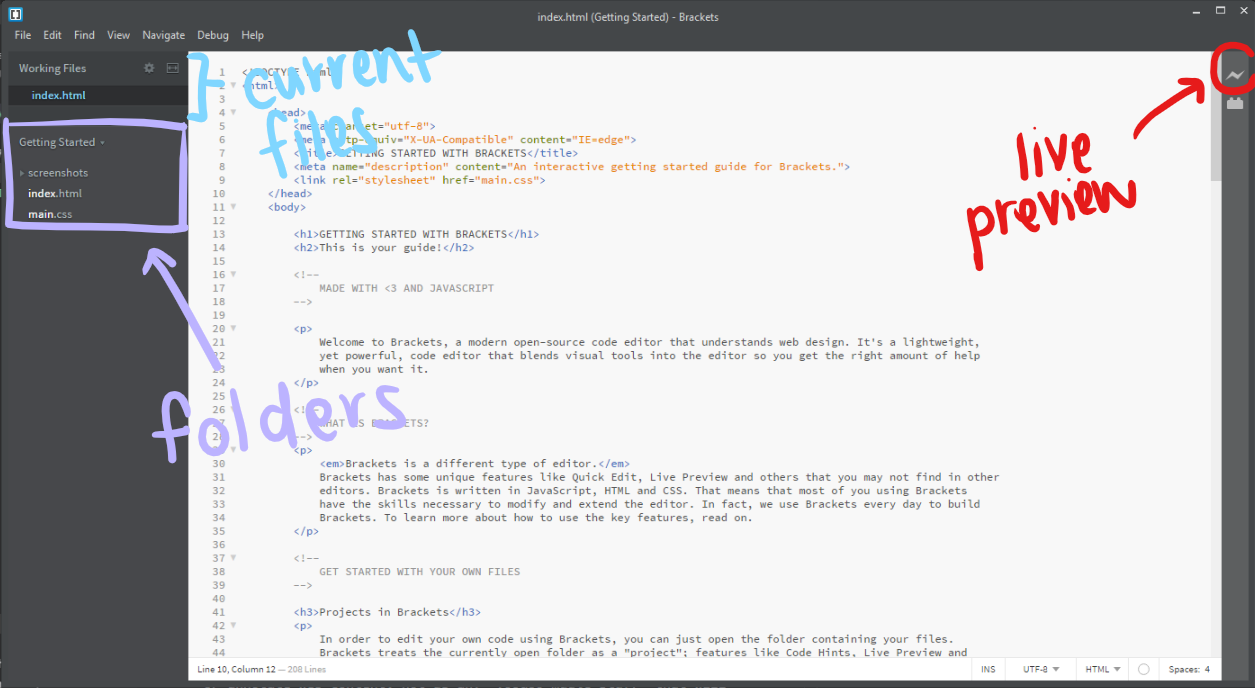
On your first installation, opening Brackets will bring you to their welcome folder.
You can open your folder (with all your HTML files) so you can access it easier. It’s under File (on the top left corner) > Open Folder.
Brackets also keeps track of the files you have open, make sure to save all these!
The most important feature that you’ll most likely be using the most is the live preview option, which opens a Google Chrome tab and updates automatically as you change your file.
You can even hover over the parts in the browser and you’ll see that it also highlights the elements in Brackets. This will help a lot in letting you see what’s actually going on as you write content.
Understanding HTML
It’s important to understand or think of HTML as a way to mark up or annotate web content, not as any voodoo magic stuff that will make your brain spin or anything like that.
Here, let’s try this. Take the following section and do these:
- put a
Pat the beginning of each paragraph - respectively, put a
/Pat the end of each paragraph - write BOLD or
Bright before a phrase or word that’s bold - write
/BOLDor/Bright before a phrase or word that’s bold (hopefully you get what’s going on here, I’m not going to repeat it for everything)- essentially, write a forward slash (
/) on the end of any label
- essentially, write a forward slash (
ITALICSorIfor… italics… obviouslyBODYfor the beginning/end of the whole section
Take a moment to do this, you can copypaste it into your word processor/text editor or do it in your head. I highly recommend you actually doing this on your own before moving on.
Five little monkeys jumping on the bed One fell off and bumped his head Mama called the doctor And the doctor said No more monkeys jumping on the bed Four little monkeys jumping on the bed One fell off and bumped his head Mama called the doctor And the doctor said, No more monkeys jumping on the bed ):<
It should look like this:
BODYPBOLDFive/BOLDlittle monkeys jumping on the bed One fell off andITALICSbumped his head/ITALICSBOLDMama/BOLDcalled the doctor And the doctor saidBOLDNo more monkeys jumping on the bed/BOLD/PPBOLDFour/BOLDlittle monkeys jumping on the bed One fell off andITALICSbumped his head/ITALICSMama called the doctor And the doctor said,BOLDNo more monkeys jumping on the bed ):</BOLD/P/BODY
An important thing is to look at the body labels, the ending body label is on the very end of the section, after the paragraph ending. Order matters, so the end of the paragraph should be before the excerpt ends. But we’ll go over this in a later section.
If you were able to do this exercise and understand it, then you can get started on HTML! Let’s get straight into it.
Terminology and Components of HTML
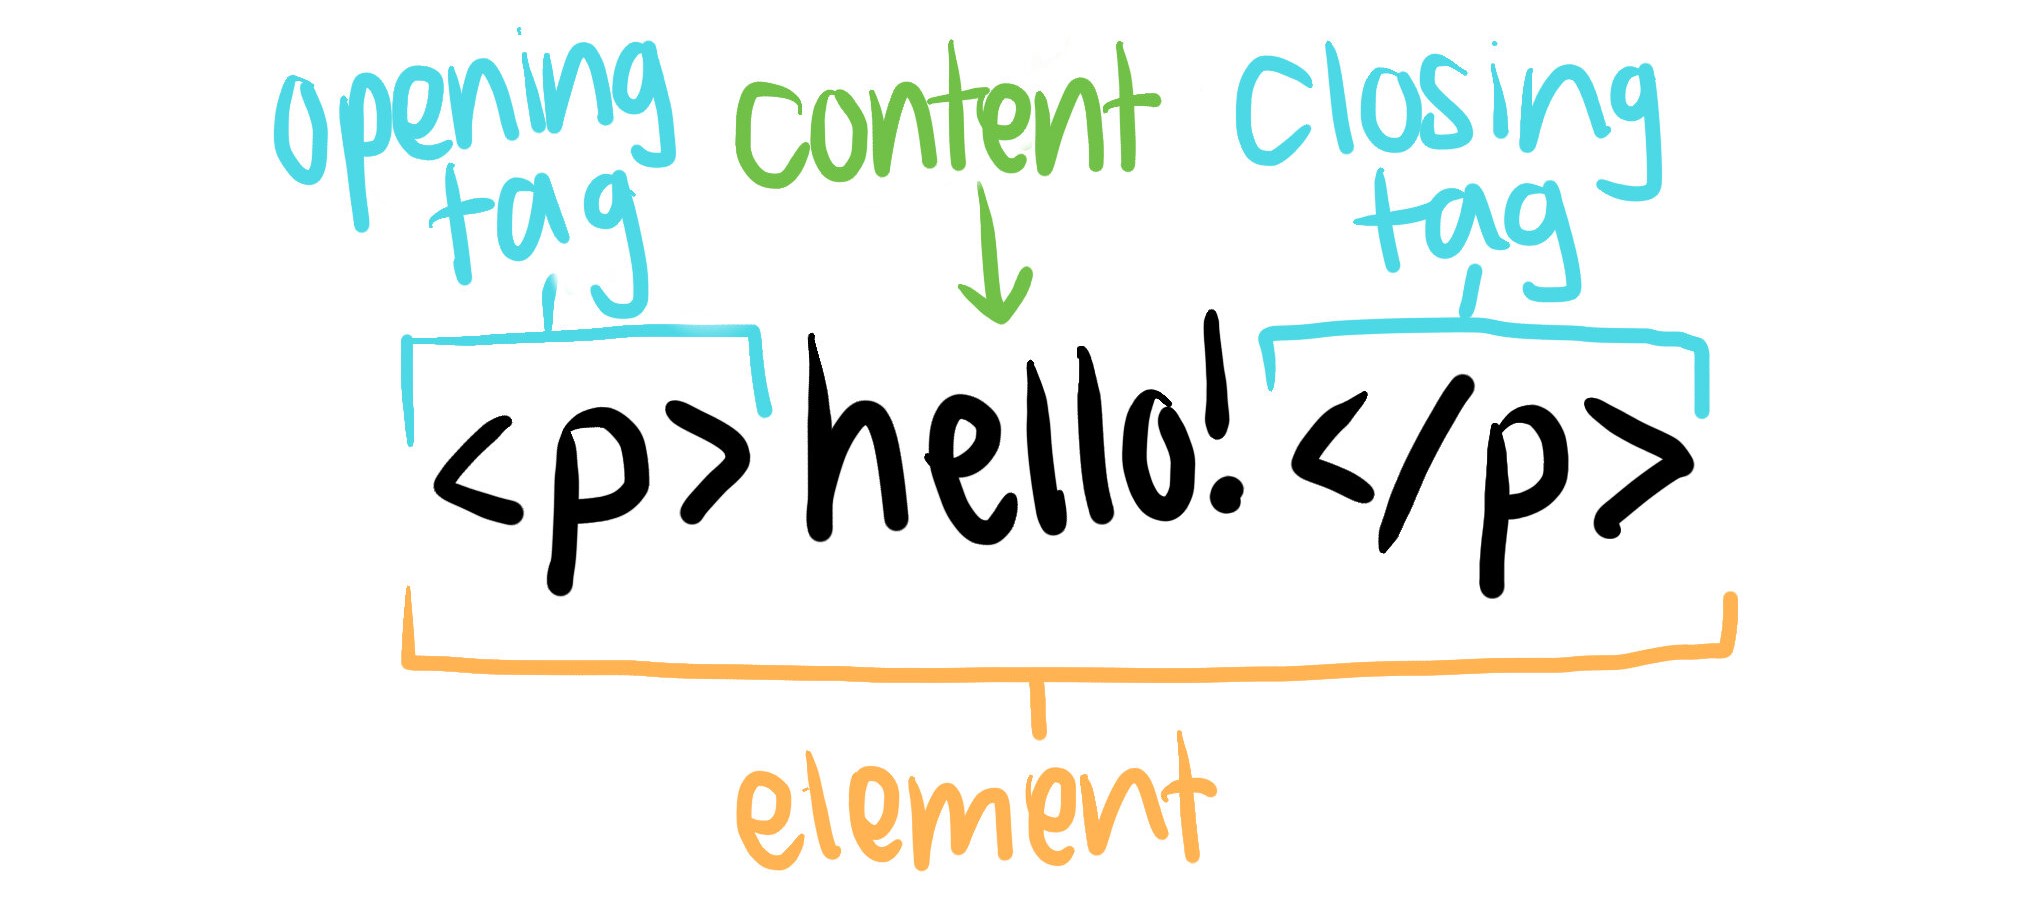
This is what makes up an element:
Opening tag - This determines the type of element (in this picture,
por the paragraph tag) and is always wrapped in angle brackets. This applies also to the closing tag too.Closing tag - It’s the same as the opening tag, but it includes a forward slash before. This marks the end of the element. Don’t forget to include the forward slash! This is a common beginner mistake and can lead weird stuff going on.
Content - well, content. In this case, it’s the text. Content can vary depending on the type of element.
Nesting elements
Now, it’s possible for elements to be nested within each other. This means that it’s an element within another element. This is pretty common, like how our BODY and PARAGRAPH
elements were nested earlier in the exercise.
<body>
<p> Five little monkeys jumping on the bed </p>
<p> One fell off and bumped his head </p>
...
</body>
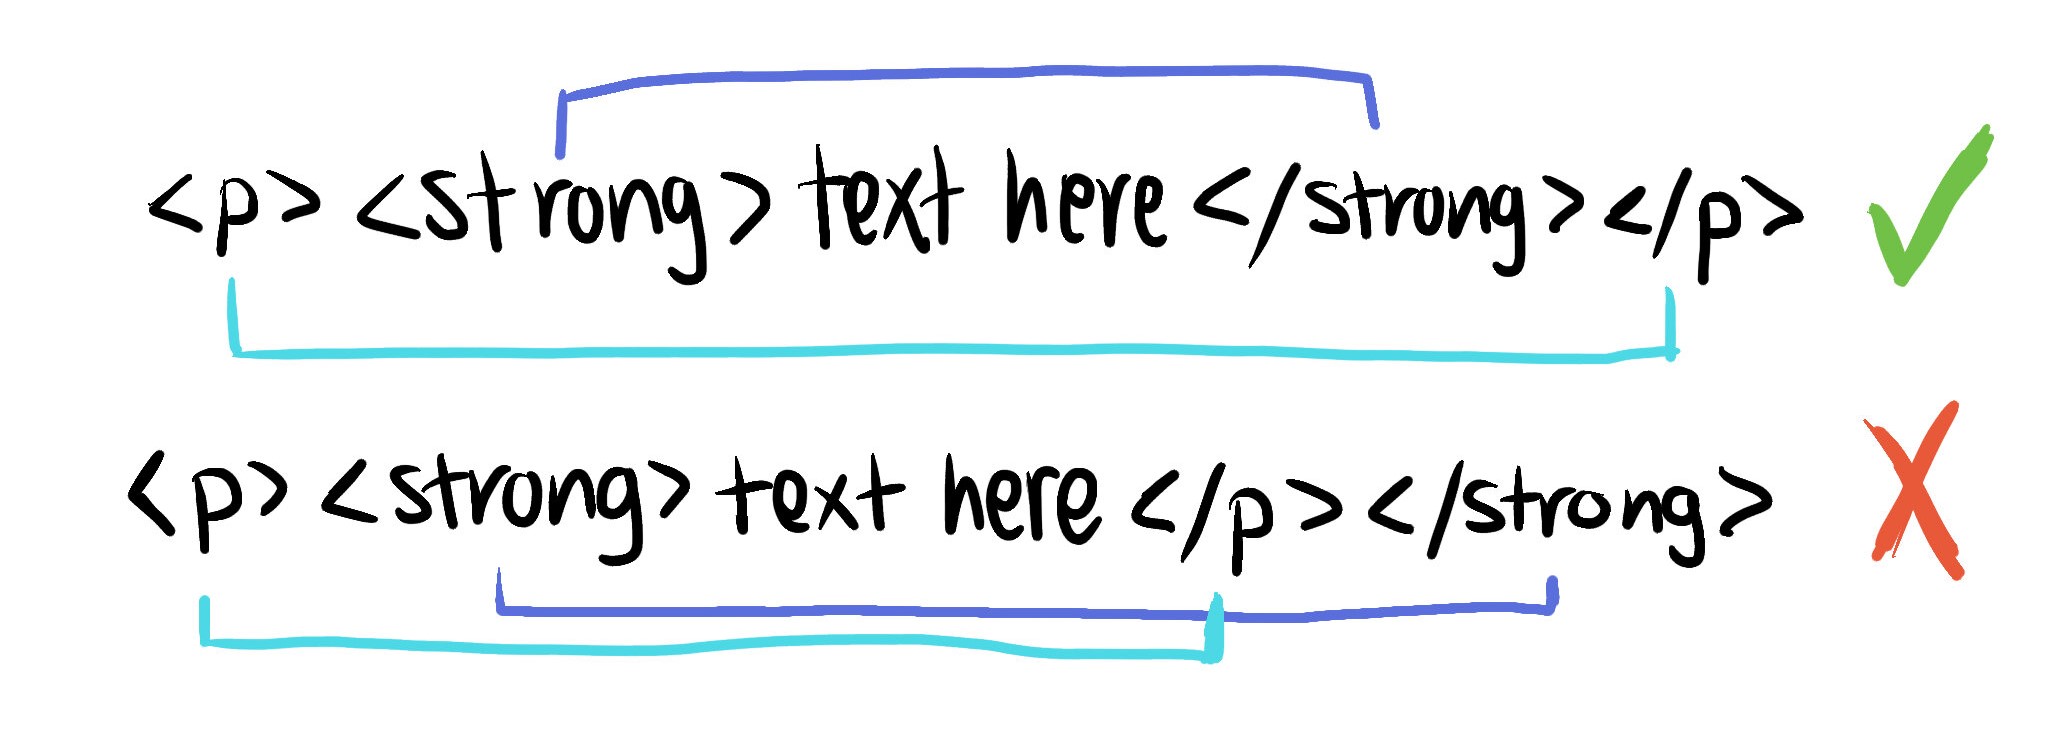
Properly nesting elements
<p> <strong> No more monkeys jumping on the bed </strong> </p>
Strong = bold element
Make sure that your elements are properly nested! In the example above and below, we started with a p element followed by a strong element, which means we have to close the strong element first and then the p.
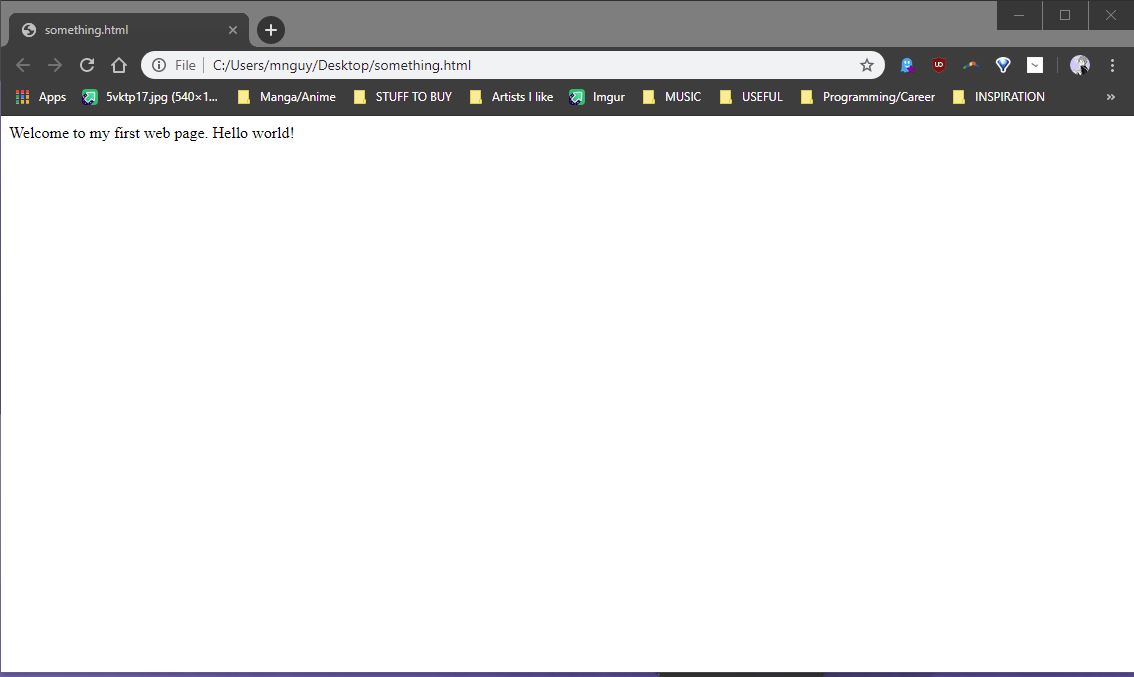
Our first web page
Try creating a simple page, that says Welcome to my first web page. Hello world!.
Here’s how you do this:
- open a new file
- add your content with the
<p>(paragraph tag) along with the content- don’t forget to add the closing tag with the forward slash!
- save the file as an
.htmlfile - your web browser won’t be able to know that it’s a webpage- you can use your live preview to look at it too, or save it first and then open it with your web browser
Hopefully, it looks like this:
But it’s looking pretty boring. Let’s add some attributes to make this text more interesting.
Attributes
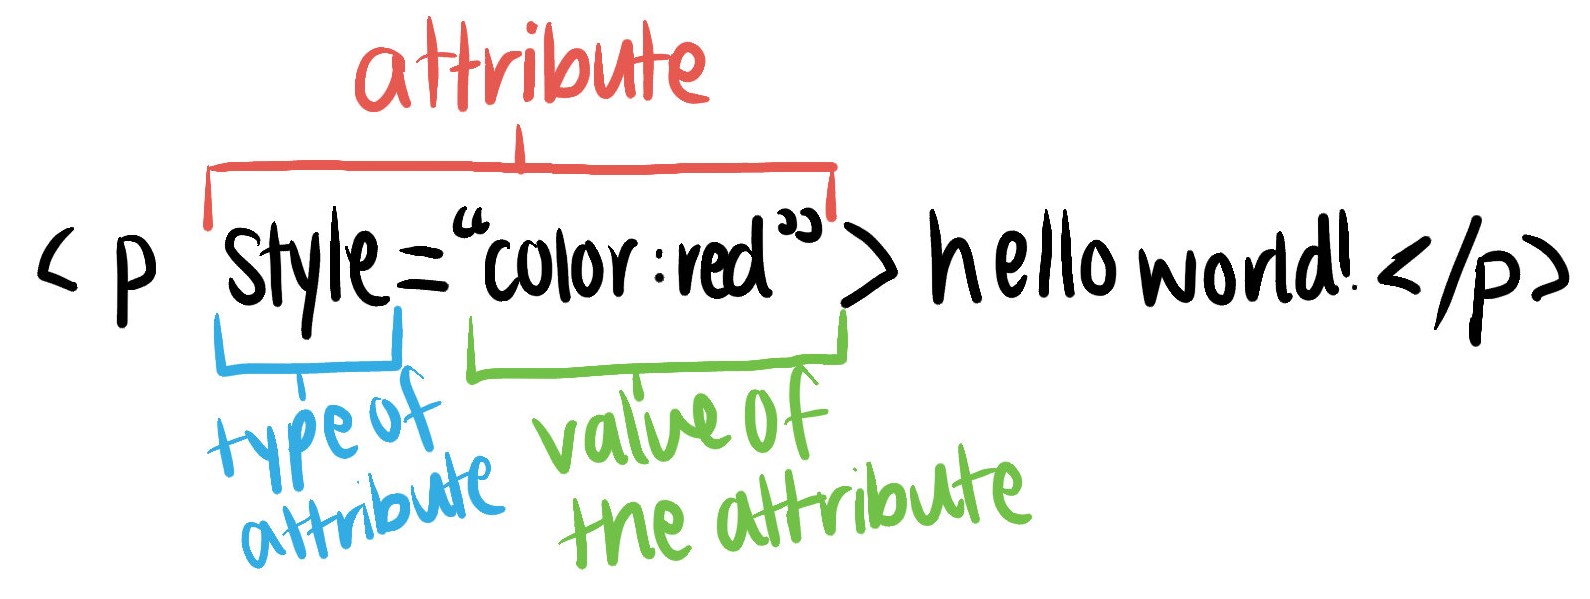
Attributes are like additional traits you can add to a element. In the example above, the style trait is added to the paragraph element, by changing the color of the text to red.
Here’s what makes up an attribute:
- the type of attribute
- an equal sign immediately after (don’t add a space before or after the equal sign)
- the attribute value, which has quote marks around it
The style attribute, in this case, can change the properties of the paragraph and multiple properties can be added. To add multiple values, separate each property with a semicolon, like so:
<p style="color:blue;text-align:center;"> hello world! </p>
Be sure to add a semicolon at the end! This is one of the things you must do or else it’ll break things.
To clarify, attributes belong to the element, while properties belong to the attribute. So it’s element > attribute > properties.
For practice, try adding the style attribute to your element. Here’s some examples of common things you would change with style:
background-color:bluetext-color:orangefont-family:verdanafont-size:300%text-align:left
Conclusion
Congrats for making it to the end of the guide! Hope you find it useful.
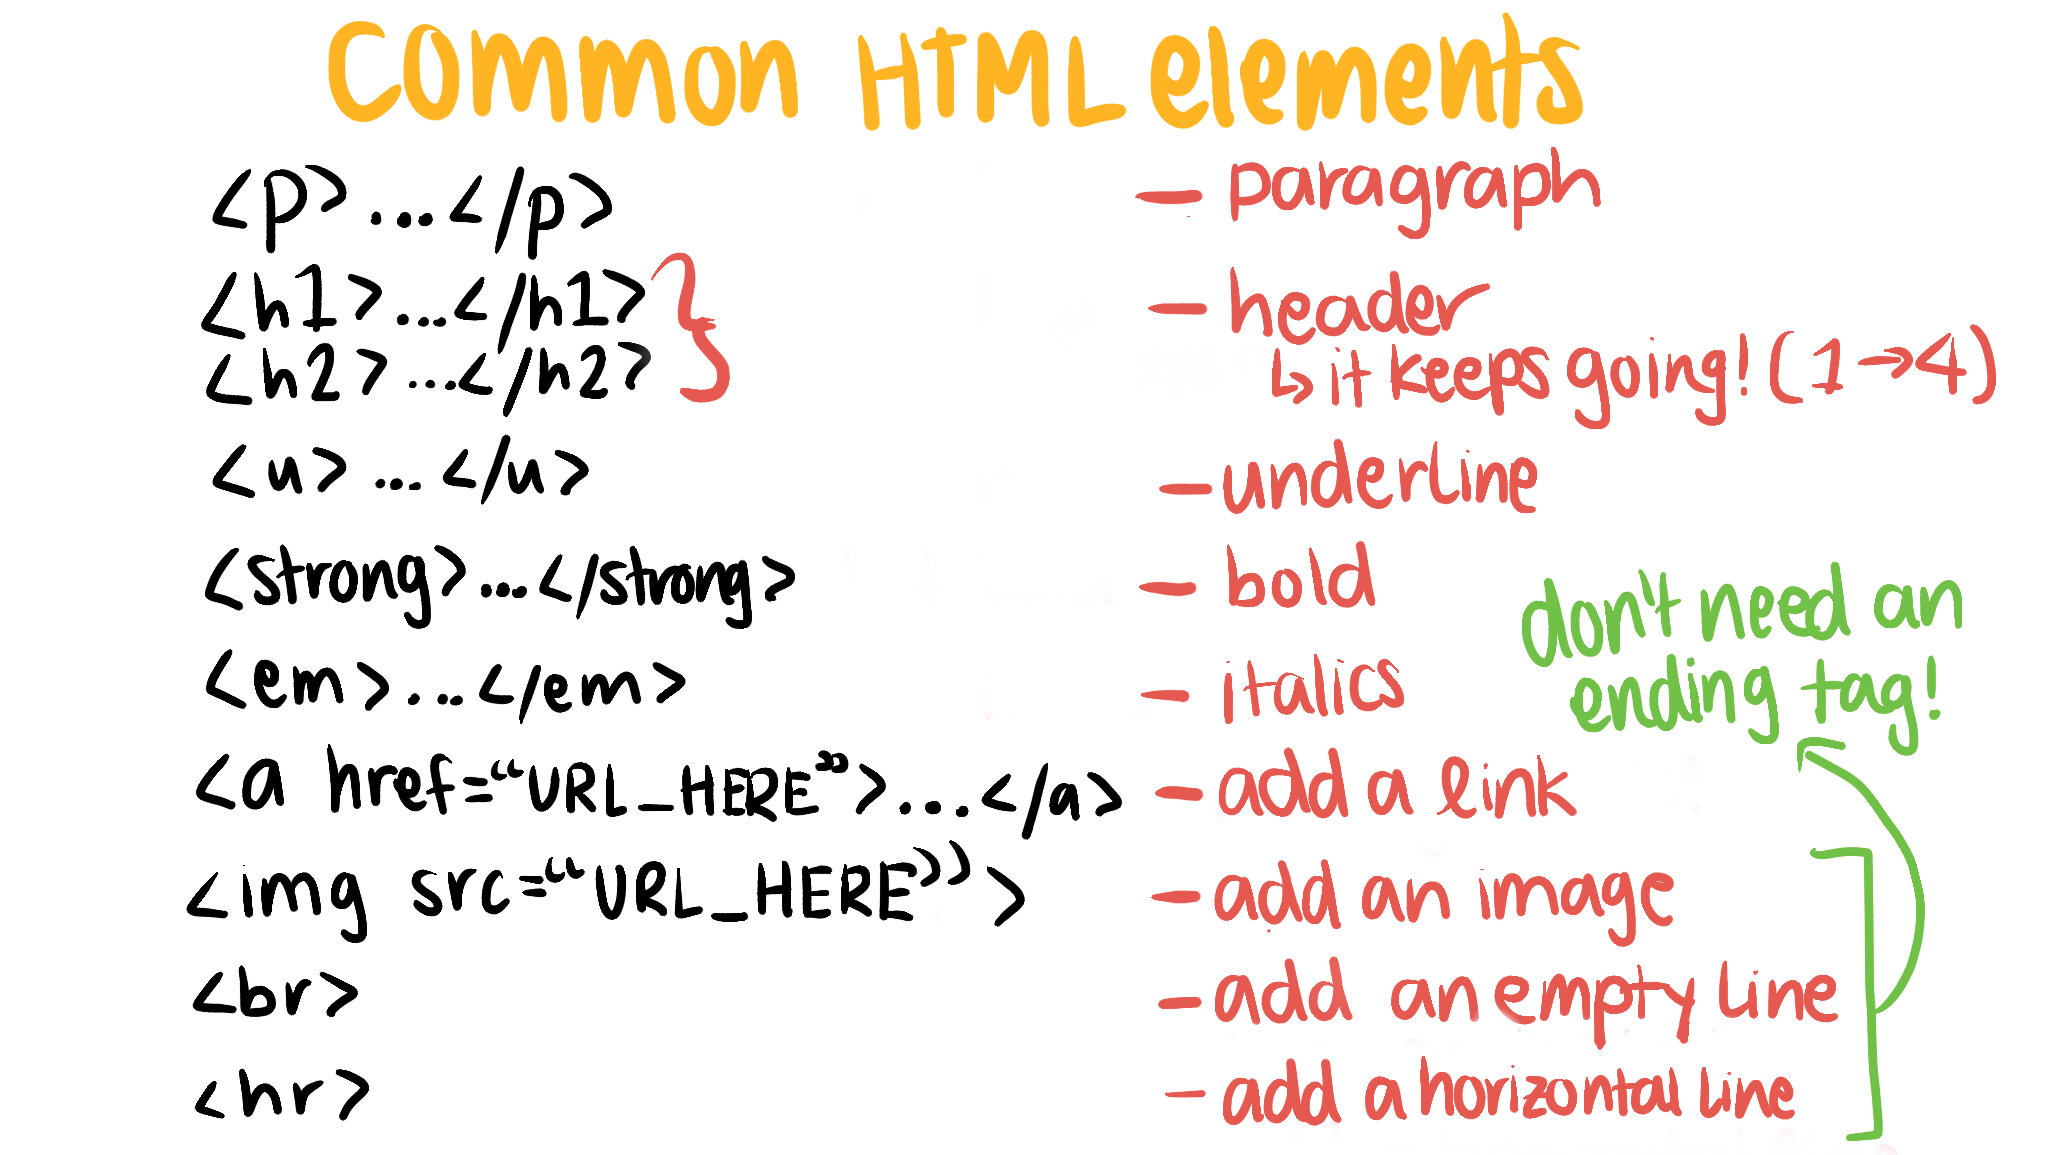
I’ve attached a list of the common tags you could use:
Here’s also an example of everything that was taught in this guide and in the common tags:
<h1 style="text-align:center;font-size:300%;"> Welcome to my webpage! </h1>
<h2 style="text-align:center;">Read some five little monkeys jumping on the bed!</h2>

<hr>

<p style="text-align:center;font-size:200%;">
<strong>Five</strong> little monkeys jumping on the bed <br>
One fell off and <em>bumped his head</em> <br>
<strong>Mama</strong> called the doctor <br>
<u>And the doctor said</u> <br>
<strong>No more monkeys jumping on the bed! </strong>
</p>

<img src="https://images-na.ssl-images-amazon.com/images/I/613z0WapZ1L.jpg">

<br>

<a href="https://www.amazon.com/Little-Monkeys-Jumping-Padded-Board/dp/0547510756">Buy the book here on Amazon!</a>
Shoutout to Mozilla’s introduction to HTML guide that I referenced to make sure everything was correct. I just thought it was a little dry for some people and not as friendly. To learn more, continue the FREE course they have hosted there.